Pages

March 30, 2011

I'm Coco For Coconut!

 Remember my sleepless night? About a week ago? Well I took care of that. I finally made my coconut cake!  I covered it in creamy vanilla buttercream and sweet, chewy coconut flakes. I went to Hobby Lobby just for this cake and got some new 6 inch cake pans, a turntable, and an icing spatula. The cake pans are just the cutest! So I came right home after I got them and got my bake on. I was so excited to finally make my cake! So much, I got a little carried away and forgot I was making white cake... 3 egg yolks later and I was off to the store for another set of ingredients. Oops! Trial and error I thought. How many times has this happened to me? I've lost count. 

Here's what I had to have:

1 box white cake mix
3 egg whites
1/2 cup of vegetable oil
1 1/4 cup of light coconut milk
1 bag sweetened flaked coconut
1 1/4 sticks of butter
2 tablespoons flour
1 pound powered sugar
1 tablespoon pure vanilla extract
1/4 cup milk

Preheat your oven to 350 degrees. In a large mixing bowl mix the first 4 ingredients according to package directions. The coconut milk is replacing the water. Take the 1/4 stick of butter and coat each cake pan then dust with flour. You could use cooking spray as well. Fill each cake pan half way and bake for about 25 minutes or until a toothpick inserted into the center of each cake comes out clean.
Cool in the pan for about 10 minutes. Turn out onto a cooling rack to cool completely. Once cooled level off the top and prepare to get your frost on!

To make the frosting:
In a mixing bowl cream the stick of butter with the vanilla. Gradually add the powdered sugar, adding the milk gradually. You might not need all the milk. You want the icing to be thick but creamy and smooth so it's easy to spread. If you have left over coconut milk feel free to use that instead of dairy. It's a nice alternative.


Set your first layer of cake on your turntable or whatever you're going to put it on. Slather on a big helping of buttercream. Spread it all around and cover it coconut. Then put your second layer on top of that. Add another giant dollop of buttercream and cover that cake, working from the top, going down the sides. You don't have to worry about making it really pretty. Once the cake is blanketed in rich decadence start piling on the coconut! Just start lightly pressing handfuls into the sides and top of the cake. Finally, cut that cake and eat it! It's like being transported to a tropical island. Yummy!!!

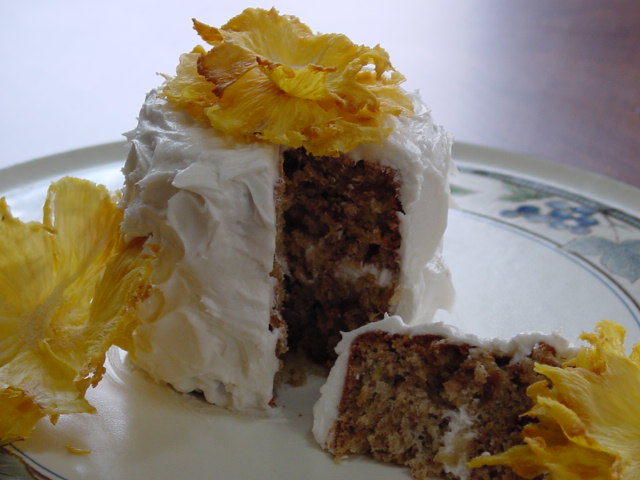
Like the flowers? They're pineapple!!!!!! Super easy to make too! Simply peel a pineapple and thinly slice it. Get your fave flower cookie cutter and cut out some flowers. Make sure you get the core in there, it's an essential part to the flower. And, it's really cool looking. 
Preheat your over to 225 degrees. Place pineapple flowers on a cookie sheet (I lined mine with a silicon pad) and bake for 1 - 1.5 hours. Turn the pineapple over and bake for about another hour. When they're done they will look like flowers! Pretty, sweet and tangy little flowers. Mine looked like this:


They naturally develop the shape and texture so you don't have to worry about shaping them. And the core beads up to look like the center of a flower! So neat. 

Happy birthday!

The other day I was having dinner with my boyfriend and 2 of our friends. One of which had a birthday yesterday. We got on the subject of cake and he said he had an idea for a birthday cake he'd like to have. He shared and I got to brainstorming on how to make this cake come to life. I came up with what I thought was a pretty good idea. Little did I know it was going to take me 2 days and a lot of icing. It came out better than I could have imagined. He loved it too! And to pat myself on the back, everyone else was equally impressed!
I think now that I have gotten through it next time won't be so time consuming. Maybe...
I got a good lesson on patience as I mixed my batter and put each cake in the oven to magically puff up in to moist, chocolaty, deliciousness. Four cakes, yes 4, and six cupcakes later I was curled up under my covers sleeping like a log. My cakes were sleeping on the kitchen counter, cooling and preparing themselves for a nice slathering of icing.

This is similar to my chocolate reese cup cupcakes but on a whole other level and, if I may say, ten times better!

Here is what you'll need:

2 - 8 inch cake pans - buttered and floured
2 - 6 inch cake pans - buttered and floured
Muffin pan with cupcake liners. The left over batter makes about 5 - 6 cupcakes.
2 boxes of devil's food cake mix
1 1/2 bag miniature reese cups
1 bag reese pieces candies
1/2 batch chocolate butter cream icing
2 batches peanut butter cream

Make the cakes in separate batches. One box will make the 8 inch cakes. The other box will make the 6 inch cakes and the 6 cupcakes. Once you have the cake batter in the cake pans add some reese cups (whole). Each 8 inch cake will have about 9 reese cups, the 6 inch cakes will have 7. Add 1 reese cup to each cupcake. Bake according to the box directions. Let cool in the pans for about 10 minutes but turn out onto a cooling rack. Let cool completely before icing.

To assemble:
Take each cake one at a time and make them level by slicing off the top, rounded part of the cake. A serrated knife works best in my opinion. Just slice across the top of the cake, almost like if you were slicing a bagel in two.


After you level each cake you can start filling and stacking them. Don't ice the top layer just yet though.

After you get all the layers filled with the peanut butter cream cover the cake with the chocolate butter cream. This is the crumb coat. It's a thin layer of frosting that captures all the crumbs. When you put on the peanut butter cream later you won't have any crumbs in your frosting. And it adds a little extra something for the depth of flavor. 
Once you've applied the crumb coat, stick the whole thing in the fridge. You want the crumb coat to harden a bit so the peanut butter cream is a cinch to put on. 
Moving on! Now that the crumb coat is nicely chilled let's get our icing on! Lots of peanut butter icing is needed. I made extra so I could go the decorating distance. And well they do say presentation is everything...
Cover the whole cake in peanut butter cream. I love my cake turn table for this job. It really comes in handy. Then just decorate it however you want! I used extra frosting and crushed up reese cups and reese pieces. It looked like this:

YUMMY!!!!!! I normally don't eat cake, I don't prefer it as a dessert. But this cake was so moist. 

He was pretty excited! I mean who wouldn't want a giant reese cup cake for their birthday? Crazy people!
So we had to cut right into it. You won't regret these calories! 

March 25, 2011

That's A Spicy Meat-a-ball!! Pizza

So took another gander at the meatball pizza last night! I must say this time around was a better success. My sister was here to help me and together we made amazing yummy things happen in my kitchen!!!! I went with a different dough recipe and while it was way better than last time, I'm just convinced dough will never be a friend of mine. I got the recipe out of an Italian cookbook, and still to no avail, it did not rise! I need a dough lesson big time. And not from a cookbook. But the rest was really simple. We used fresh veggies and fresh cheese. I made the sauce (pretty tasty!). 
I loooove pizza! You can do anything with it. This was definitely a happy dinner crowd. This pizza will appear on my table again. And it should appear on yours too! I think you would like it. Feel free to experiment with the crust or buy store bought. 

For my "not so rising" crust: 
1 1/2 all purpose flour, extra for dusting
1 tsp. salt
1 tsp. active dry yeast
1 tbsp. olive oil
6 tbsp. luke-warm water (I didn't think 6 was enough and used about 10)

Pre-heat oven to 450 degrees. 
Sift the flour and salt into a medium size bowl. Stir in the yeast. Make a well in the middle of the bowl and add your oil and water. Gradually stir in the flour with your hand. When a soft ball of dough is formed turn it out onto a floured surface and knead for 5 minutes. Return to a clean bowl and cover with some lightly oiled plastic wrap. Let rise for one hour. 
When (if) it's risen, turn out on a floured surface once more and knock down. Knead briefly, cut in half, and roll out to 1/4 inch thickness. Bake on a lightly oiled baking sheet. 

This serves 2 so you might want to make 2 batches or 1 bigger batch. Just double everything up.

For my "oh-so-delish" meatballs: 
1 lb. ground beef
2 eggs, well beaten
3/4 c. Italian seasoned bread crumbs
1/4 c. Romano cheese, grated (imported preferred)
1 tsp. salt
Black pepper to taste
1 1/2 tbsp. basil
1/4 tsp. garlic powder
1 shallot finely minced

Mix all ingredients well and shape into golf-ball size. Place in a non-stick baking pan or spray pan with pan coating. Bake in a preheated oven at 375 degrees for 15 minutes. When the sauce is ready and the meatballs are done add them to the sauce to stay warm and yummy!

Let's get saucy!!:
1 shallot, minced
2 whole cloves of garlic (I push them through a garlic press but you can mince if you don't have one)
1 tbsp. extra virgin olive oil
1 28 oz. can crushed tomatoes
1 tbsp. italian seasoning
1/8 tsp. crushed red pepper (for a little zing!!)
salt and pepper to taste

Heat the oil in a sauce pan over medium heat. Add the shallot and the garlic and cook until the onion is soft. Add the tomatoes and the seasoning. Bring to a simmer for 15 minutes. 

After all is said and cooked just assemble your pizza! You can use whatever else you like. We chose green peppers, red onion, black olives, parmesan cheese and fresh mozzarella.  And on a more fattening note, we brushed the crust (pre-saucing) with garlic infused butter! 


After baking for about 12-15 minutes it turned out to be something like this:

March 23, 2011

Sweet Dreams?? I don't think so...

The flowers here are made from pineapple!
You've got it bad when you can't sleep because you're thinking of food. I toss and turn, sometimes almost giving up on sleep, because of food. Most people lay down and start thinking about what they need to do tomorrow. I lay down and start thinking about the next thing I want to cook. One time, for almost a week, I had trouble going to sleep because I kept thinking about pulled pork. Succulent, tender, fall off the bone and smother it in sauce, pulled pork. So that week I made some. Another time it was crema. Mexican crema to be exact. I wanted to make it extra special with onion and chilis, and cilantro, spice it up a little and drizzle it on a taco. So I did. It was keeping me from my sleep. I love my sleep. I had to do something about it!
Now, it's 11:50 at night. I have to be at work at 7:00 in the morning. I should be snoring... But here I am.

Tonight I'm thinking about cake. Coconut cake. Moist, fluffy, covered in butter cream. Vanilla bean butter cream. Sweet island bliss in a cake. Surrounded by pretty yellow flowers made out of dried pineapple. OMG!!! It's going to be my undoing if I don't get this cake. I was going to make it 2 days ago but instead found myself at a flea market. What treasures did I find? Only a cake stand! Thus confirming my subconscious desire for this cake. So I've decided that this coming Thursday will be the day. I'm off work and don't have a lot of errand. Perfect? I think so. I'll be sure to post this sleep depriving cake and it's pretty little decorations. I hope it doesn't disappoint. Then again, when does cake ever disappoint?!
This picture was my inspiration for my pineapple flowers. The flowers on this cake are pineapple! How cute! I can't wait to make my own. I hope they look this good! 


Pictures from: http://www.axis-of-aevil.net/archives/food/american/cakes_and_pies/  &
http://radio-weblogs.com/0129838/stories/2004/04/18/isMyBlogBurningCakeWalkTheHummingbirdCake.html

March 7, 2011

Cheesy Orzo Stuffed Chicken with Pink Vodka Sauce

Here's what you'll need:

1 pound chicken breast (either thinly sliced or butterflied will work)
1/4 cup cooked orzo pasta
1 small onion, minced and separated in 2 equal piles
1 cup ricotta cheese
1/4 cup Parmesan cheese
1/4 cup shredded mozzarella 
1 tablespoon chopped fresh parsley, plus a teaspoon more for garnish
salt and pepper
1 clove of garlic, minced
1/2 cup vodka
28 oz can crushed tomatoes
1 1/2 tablespoons italian seasoning
pinch of red pepper flake
1/2 cup of heavy cream
2 tablespoon extra virgin olive oil

Stuffed Chicken
Preheat the oven to 350 degrees. Season the chicken with salt and pepper and set aside. 
In a medium skillet heat 1 tablespoon of the olive oil, over medium heat.  Add half of the onion and saute until tender and slightly golden. Drain off on a paper towel.  
In a medium size bowl mix together the cheeses, pasta, parsley, and onions. Spread evenly onto the chicken breast. If they're butterflied just fold them over and secure with a toothpick. If they are thinly sliced roll them up and secure them with a toothpick. Make sure to leave enough room to be able to pull the toothpick out once the chicken is cooked. 

Vodka Sauce
In a sauce pan heat the other tablespoon of olive oil. Add the garlic and the other half of the onion. Cook until the onion in tender and translucent. Add the vodka and cook until reduced by half, about 5 minutes. Add the tomatoes, the seasoning and a pinch of salt and pepper. Bring to a boil then reduce to a simmer. Cook until slightly thickened. Take off the heat and add the cream. 

Put the stuffed chicken into a greased casserole dish. Pour the sauce over top. Bake for 40-45 minutes or until the chicken is cooked through.